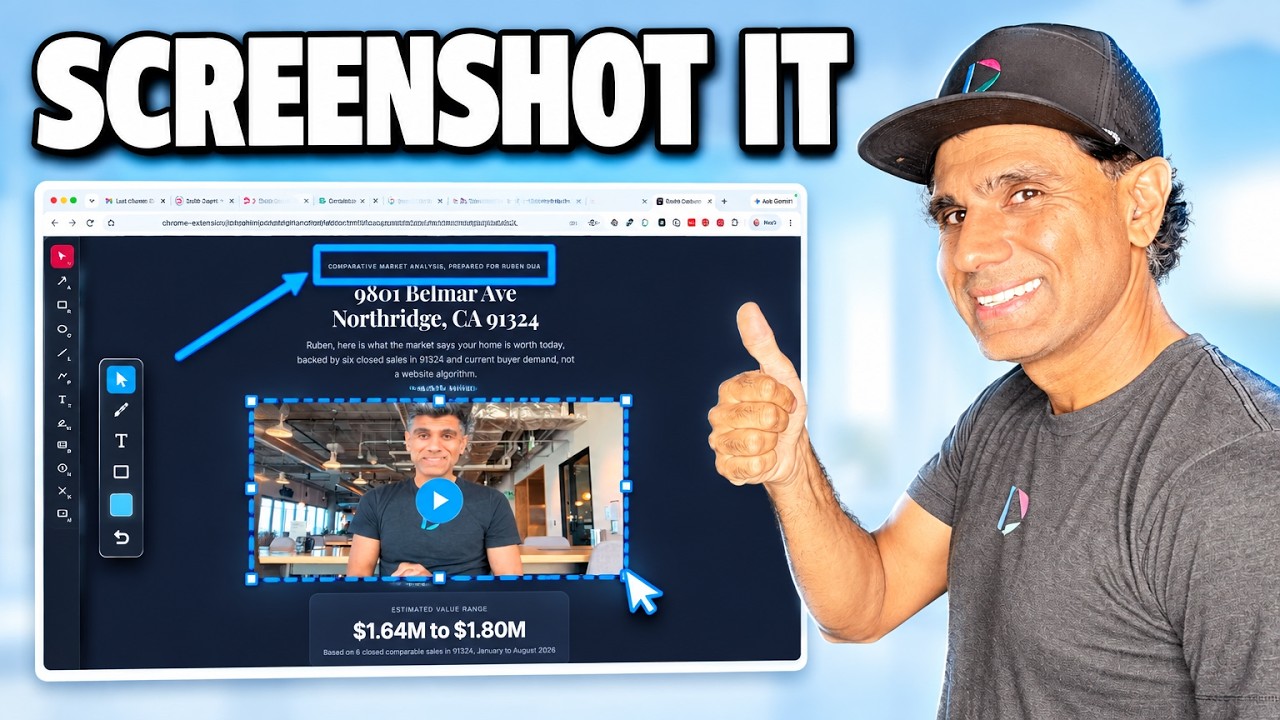
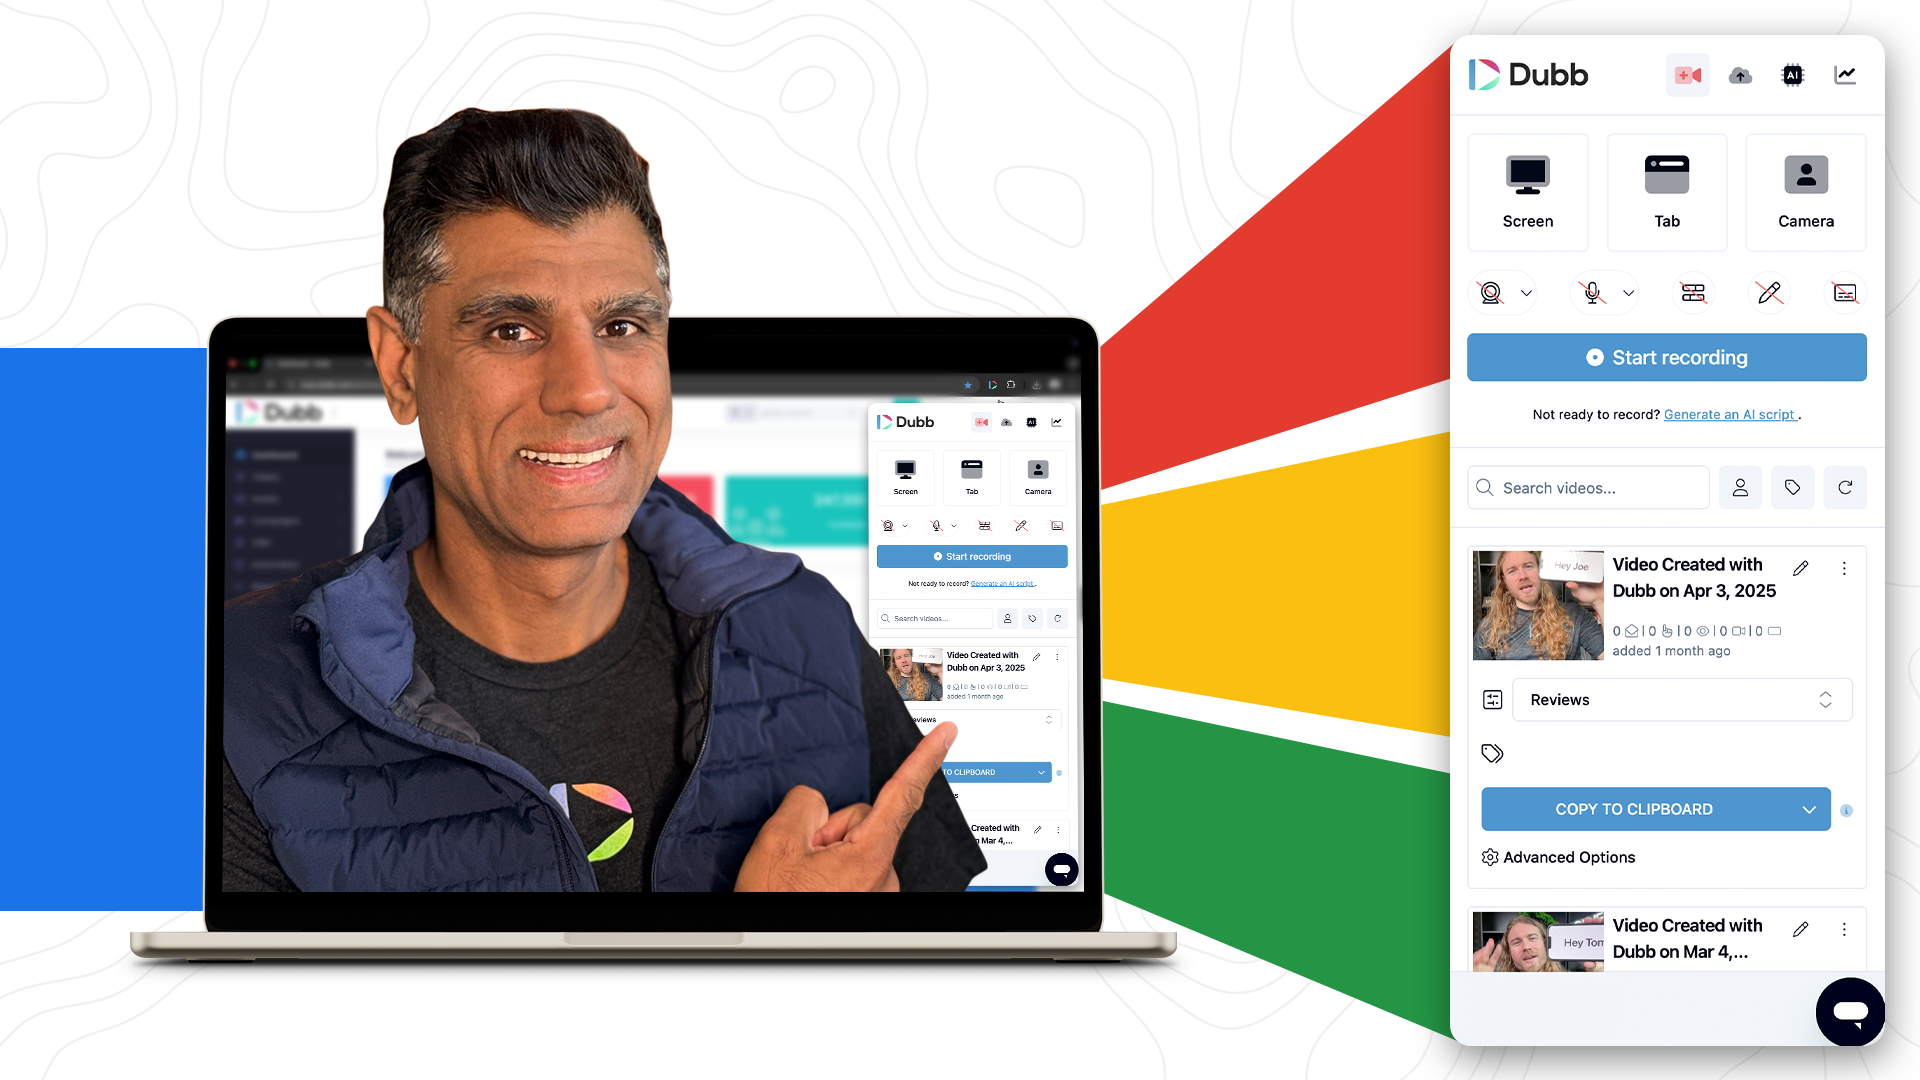
A webcam bubble should be small enough to leave the page readable, shaped to match the site it sits on, and placed beside the thing being discussed rather than in a default corner. Inside the bubble the presenter can zoom and reposition, and the camera can be switched off entirely for an audio walkthrough. Double-clicking the bubble jumps the recording to full screen.
What Is a Webcam Bubble?
A webcam bubble is the small live camera window layered over a screen recording, showing the presenter while the screen behind them is captured. Its defining characteristic is that it is composited at record time rather than added afterwards, so its size, shape, and position are decisions made before and during the recording rather than in an editor.
In the Dubb Chrome extension the bubble is adjustable in all three of those dimensions while you are setting up, and repositionable while you record. It can be a circle, a square, a rectangle, or a phone shape, it can be resized freely, and you can zoom and move yourself around inside it. It can also be switched off, replaced with a headshot, or expanded to fill the screen mid-recording.
Table of Contents
- Getting the Extension Open on a Page
- Size: The Mistake Almost Everyone Makes
- Shape: Match the Page You Are On
- Placement: Put Yourself Next to What Matters
- Framing Yourself Inside the Bubble
- Camera On, Camera Off, or a Headshot
- Camera, Tab, or Screen: Choosing What Gets Captured
- The Jump to Full Screen
- Pause, Resume, and Recording at Your Own Pace
- Annotations That Carry Meaning
- Why the First Three Seconds Decide the Rest
- Finishing, and Where the Video Goes
- Webcam Overlay Tools Compared
- Common Mistakes and Troubleshooting
- Best Practices I Actually Follow
- Proof: Why This Actually Works
- Frequently Asked Questions
- The Bubble Is the Composition
Getting the Extension Open on a Page
Search for the Dubb Chrome extension, install it, and pin it to your browser bar. That is a three step process and it is the whole setup. If you want the fuller installation walkthrough, we covered it in our guide to screen recording videos.
From then on, navigate to whatever page you want to record and tap the extension button. It drops you onto the page with the bubble live and every control available.
I am going to use a LinkedIn profile as the running example because it is the clearest case, but nothing here is LinkedIn-specific. It applies to any page you want to be on top of: a pricing page, a proposal, a dashboard, a document, a competitor's site.
Size: The Mistake Almost Everyone Makes
You can drag the webcam bubble from small to large, and there is a custom sizing control for anything in between.
The mistake is going too big. It feels natural, because a bigger version of you seems more present and more personal. What actually happens is that you cover the page, and the page is the reason you chose to record here instead of just recording a webcam video.
The test I apply is simple. If someone paused the video at a random second, could they still read what is behind me? If the answer is no, the bubble is too large. A screen recording where the screen is obscured is a webcam video with extra steps.
Smaller than feels right is usually correct. You are not competing with the page for attention. You are the reason the page is worth looking at.
Shape: Match the Page You Are On
The webcam bubble can be a circle, a square, a rectangle, or a phone shape.
My rule is to match the visual language of the page I am recording on. LinkedIn uses circular profile photos, so on LinkedIn I use a circle. It reads as though I belong on the page rather than as though something has been pasted over it. On a page built out of rectangular cards, a rectangle disappears into the layout the same way.
The phone shape has a different job. It is a vertical frame, so it reads as a message rather than as a presentation. I use it when the tone should be closer to a text than a demo.
This is a small decision and it takes two seconds, which is exactly why it is worth making deliberately. The viewer will not consciously notice that your shape matched the page. They will notice if it did not.
Placement: Put Yourself Next to What Matters
Most tools drop the webcam bubble in a corner and most people leave it there. The corner is a default, not a decision.
Place yourself next to the thing you are talking about. On a LinkedIn profile, that means putting your bubble beside their profile photo. You are now visually next to the person you are addressing, and there is something disarming about that composition that no amount of scripting achieves. You are close enough to knock on their bubble.
The same principle transfers everywhere. Recording over a pricing page, sit next to the plan you are recommending. Recording over a proposal, sit beside the clause in question. The bubble is a pointer as much as it is a picture of you.
What you are avoiding is the composition where the presenter is stranded in the bottom left and the content is somewhere else entirely, with the viewer's eye bouncing between two unrelated things.
Framing Yourself Inside the Bubble
Inside the webcam bubble you have controls of your own. You can zoom in, back yourself out, and move yourself around within the frame.
This matters more than it sounds. A webcam mounted on a monitor puts most people slightly off centre with a lot of ceiling above their head, and a small circular bubble crops that badly. Zooming in and centring yourself takes a few seconds and is the difference between looking framed and looking captured.
Get your eyes into the upper third of the bubble and your face filling most of it. In a small bubble there is no room for a wide shot, so anything that is not your face is wasted space.
Camera On, Camera Off, or a Headshot
You do not have to be live. There is a button to turn the camera off, and there is the option to use a headshot, a profile picture, or an avatar in the bubble instead.
| Option | What the Viewer Sees | When I Use It |
|---|---|---|
| Live camera | You, moving and speaking, over the page | Anything cold, anything relationship-building, anything where being a real person is the point |
| Headshot or avatar | A still image of you in the bubble while you narrate | When you are not camera-ready but the recipient should still know who is talking |
| Camera off | The page only, with your voice over it | Detailed walkthroughs for people who already know you, where the screen is genuinely the content |
For outreach I would use the live camera almost every time. The whole advantage you have over a written message is that they get to see a person, and a still image gives most of that away. But the option exists, and an audio walkthrough recorded today beats a camera-ready one recorded never.
Camera, Tab, or Screen: Choosing What Gets Captured
Chrome gives you three orientations, and they are not interchangeable.
Camera opens wide, like a webcam recording, with no screen behind you. This is for a message rather than a demonstration.
Tab records only the page you are on. Your other tabs, your bookmarks bar, the browser chrome and whatever mess is at the top of your window are all excluded. The recording is just the page, cleanly.
Screen captures your entire display. There is one good reason to choose it, and it is that you want to take someone on a tab journey: start on one page, move to another, and let the bubble travel with you across the whole trip.
Tab is my default and I would suggest it as yours. It hides everything you did not intend to show, which is most of what makes screen recordings look unprofessional. Reach for screen only when the movement between windows is part of the story.
A word of caution about full screen recording. If your display has a CRM, an inbox, a calendar, or a spreadsheet visible, that is other people's information and it is now in a video you are about to send. Tab recording is the safer default for this reason as much as any aesthetic one. If you do record the full screen, close what should not travel and turn off notifications first.
The Jump to Full Screen
Mid-recording, hover over the bubble and double-click it. You expand to full screen. Double-click the screen and you drop back to where you were.
This is the most underused control in the whole extension, and it is the one that makes a recording feel edited when it is not.
Use it to break the visual. Open on the page with your small bubble beside their photo, deliver your hook, then jump to full screen for the sentence that actually matters. The change in scale does the work that a cut would do in an edited video, and you did not edit anything.
The other use is emphasis. When you want to be certain a point lands, being the only thing on screen while you make it is a stronger instrument than raising your voice.
Pause, Resume, and Recording at Your Own Pace
There is a pause button and a resume button at the bottom of the recording controls.
Your style is your style. Some people prefer to scroll, talk, and move continuously, and that reads as natural and unrehearsed. Others want to think between sections. If you are in the second group, pause the recording, work out what you want to say next, then hit resume.
The reason this matters is that most people who abandon a screen recording abandon it because they lost the thread halfway through and started over. Pausing costs nothing and it removes the only real reason to restart.
Annotations That Carry Meaning
The annotation tool sits on the left and it works at any point during the recording. You can circle things, write text on the screen, and mark items up.
The habit worth forming is using annotations to carry structure rather than just to point. Numbering three items in order of importance tells the viewer something a circle does not. Circling one thing and crossing out another makes a comparison visible. Writing a single word beside a figure gives it a label it did not have.
The failure mode is scribbling. Annotation that only says "look here" while you are already saying "look here" adds nothing and costs clarity. If you would not have drawn it on a whiteboard, do not draw it here.
One caution: whatever you annotate is burned into the recording. If you circle a number on a page containing anything confidential, that number is in the video permanently. Check what else is in frame before you draw.
Why the First Three Seconds Decide the Rest
When your video is sent, the opening seconds usually become an animated preview in the message. That preview is what the recipient sees before they decide whether to click.
So the first three seconds are not a warm-up. They are the advertisement for the rest.
What works is a hook that is visibly about them. Their profile on screen, your face beside it, and a first line that could not have been sent to anyone else. On the example I keep coming back to, that was noticing the book someone had written. It is specific, it is unmistakably about that person, and it fits in a preview.
What does not work is opening with your own name and company while nothing on screen is about the recipient. That produces a preview identical to every other preview.
If you want the wider strategy for this on LinkedIn specifically, we wrote about using video to generate leads through LinkedIn separately.
Finishing, and Where the Video Goes
Click the check mark and the recording ends and saves straight into the platform, landing on the video edit page. Title, landing page, sharing, and tracking all happen from there.
This is worth stating because it differs from the desktop app, where the check mark ends a clip rather than a video and nothing is saved until you merge. If you use both, that difference will catch you once. Our post on recording with the Dubb desktop recorder covers the desktop side.
Keep the recording under a minute for outreach. Not because a rule says so, but because a short video from a stranger gets watched and a long one gets postponed, and postponed means never.
Webcam Overlay Tools Compared
Plenty of tools will put a camera over a screen recording. What separates them is how much control you get over the composition and what happens to the video afterwards.
| Tool | Bubble Control | While Recording | Best Fit |
|---|---|---|---|
| Dubb | Four shapes, custom sizing, free placement, zoom and reposition inside the bubble, headshot or camera off | Double-click to full screen and back, pause and resume, live annotation | Outreach and sales video where the composition is part of the message |
| Loom | Circular bubble, a few sizes, moveable position | Pause and resume, drawing tools on paid plans | Fast internal updates and async team communication |
| Vidyard | Circular bubble with size and position options | Pause and resume, on-screen drawing | Sales teams already standardised on its hosting and analytics |
| OBS Studio | Total control through scenes and sources, configured in advance | Scene switching, hotkeys, no built-in annotation | Streaming and produced content where setup time is acceptable |
If you are producing content, use a production tool. The case we built for is the other one: a video composed in the thirty seconds before you record it, sent to one named person, watched today.
Common Mistakes and Troubleshooting
A webcam bubble that covers the page. The most common mistake by a distance. Shrink it until the page reads at every moment of the video.
Leaving the webcam bubble in the default corner. Move it next to whatever you are discussing. Placement is a sentence you get for free.
Recording the full screen out of habit. Use tab unless you specifically need to move between windows. It hides your tab clutter and it keeps other people's data out of the video.
A badly cropped face. Zoom and centre yourself inside the bubble before you record. A small bubble is unforgiving of a wide webcam shot.
Never using full screen. One double-click at the right moment is the closest thing to editing that an unedited video has.
Starting over after a stumble. Pause, gather the thought, resume. Restarting is why most unfinished videos are unfinished.
Notifications on screen. They will appear in your recording and you cannot remove them afterwards. Turn them off before you press record.
Best Practices I Actually Follow
None of these are specific to one tool, and all of them are decisions made before recording rather than after.
Match the shape to the site. Circle on LinkedIn, rectangle on card-based layouts, phone shape when the tone should be conversational.
Sit next to the subject. Their photo, the plan you are recommending, the clause in question.
Frame your face before you speak. Zoom, centre, eyes in the upper third.
Put the hook in the first three seconds. That is the preview, and the preview is the whole decision.
Plan one full screen jump. Know in advance which sentence deserves it.
Record the tab, not the screen. Unless the journey between windows is the point.
Stay under a minute for anything cold. Length is a promise you are asking a stranger to accept before they have any reason to.
Proof: Why This Actually Works
The argument here is that composition is content, and it is one we have watched play out repeatedly.
Two patterns hold consistently across the people we help. The first concerns the opening. Videos whose first seconds show something specific to the recipient get opened more often than videos that open on the sender alone, and the mechanism is not subtle: the animated preview is the only thing most recipients see before deciding, so whatever is in those seconds is doing all the persuading.
The second concerns bubble size. Recordings where the page stays readable behind the presenter hold attention longer than recordings where it does not. That one surprises people, because a larger bubble feels more personal. In practice a viewer who cannot read the page has no reason to keep watching a screen recording at all.
Methodology note: these are directional observations drawn from aggregated, anonymized usage patterns across Dubb users, not a controlled study. No figures are attached to either pattern, and results vary by audience, industry, and how the videos are sent.
What I take from it is that the webcam bubble is not decoration around the recording. It is the composition, and it is decided in the thirty seconds before you press record.
Frequently Asked Questions
How do I record myself and my screen at the same time?
Install the Dubb Chrome extension, pin it to your browser bar, then navigate to the page you want to record and click the extension button. It opens directly on the page with your webcam bubble live.
Set the size, shape, and position of the bubble, choose whether to record the camera, the current tab, or the whole screen, and hit record. You appear over the page while it is captured behind you.
How big should my webcam bubble be?
Small enough that the page behind you stays readable at every moment of the video. The test I use is whether someone pausing at a random second could still read what is behind me.
Going too large is the most common mistake, because a bigger bubble feels more personal. What it actually does is hide the page, which is the reason you chose a screen recording in the first place.
Where should I put the webcam bubble on the screen?
Next to whatever you are talking about, rather than in the default corner. On a LinkedIn profile that means beside the person's profile photo, so you are visually next to the person you are addressing.
The same idea transfers anywhere. Sit beside the pricing plan you are recommending or the clause you are questioning. The bubble points at things as well as showing your face.
Can I record my screen without showing my face?
Yes. There is a button to turn the camera off, which gives you an audio walkthrough over the page, and you can also put a headshot, profile picture, or avatar in the bubble instead of live video.
For cold outreach I would still recommend being on camera, because being seen is the main advantage video has over writing. For a detailed walkthrough sent to someone who already knows you, camera off is perfectly reasonable.
Should I record the tab or the whole screen?
Record the tab by default. It captures only the page you are on, so your other tabs, bookmarks, and browser clutter never appear, and other people's data on your other windows stays out of the video.
Choose the whole screen only when moving between windows is part of what you are showing, such as taking someone on a journey from one tab to another. If you do, close anything confidential and turn off notifications first.
How do I go full screen in the middle of a recording?
Hover your mouse over the bubble and double-click it. You expand to full screen. Double-click the screen again and you return to where you were.
It is the closest thing to a cut that an unedited recording has. I plan one jump in advance, usually for the single sentence that matters most, because the change in scale does the emphasis for me.
The Bubble Is the Composition
Everything in this article happens before you press record or while you are recording. None of it is editing, and none of it takes more than a few seconds.
Match the shape to the page. Shrink the bubble until the page reads. Put yourself next to what you are discussing. Frame your face inside the bubble. Record the tab. Lead with something that could only have been sent to this person. Jump to full screen once. Pause when you need to think.
The Dubb Chrome extension gives you all of those controls in the moment rather than in an editor afterwards, which is the point: a video that needed editing is a video that gets sent tomorrow, and tomorrow is where most outreach goes to die. If you want the shorter overview of the extension itself, our Chrome screen recorder guide covers it.
If you change one thing after reading this, make it the size of your bubble. It is the fastest improvement available and almost nobody makes it.