A recorded video is edited from the video page, where a timeline editor allows the playhead to be positioned, the clip split at that point, and the resulting segment deleted. Splitting twice isolates a middle section for removal, and each cut can be reversed with a separate undo. The same page carries the video's title, landing page preset, download and publishing options, a QR code, and viewing analytics.
What Is the Video Page?
A video page is the single screen from which a recorded or uploaded video is managed after capture, combining trimming, metadata, distribution settings, and performance data in one place rather than across separate tools. Its defining characteristic is scope: the same screen governs how the video is cut, how it is presented, where it can be sent, and how it performed.
In Dubb, this page is reached from Videos in the studio dashboard. It carries auto titling drawn from the opening of the recording, a basic timeline editor, a preset selector controlling the surrounding landing page, MP4 download and YouTube publishing, a QR code, and both activity tracking and a generated content analysis.
Table of Contents
- Finding the Page
- Auto Titling and Your First Twenty Seconds
- Video Editing: Split, Delete, Undo
- The Whole Page at a Glance
- Previewing and Switching Presets
- The QR Code, and Where to Put It
- Activity and Content Analysis
- Downloading, Publishing, and Captions
- Pinning, Ownership, and Privacy
- Common Mistakes and Troubleshooting
- Best Practices Worth Adopting
- Video Editing Tools Compared
- Proof: Why This Actually Works
- Frequently Asked Questions
- One Page for Everything After Record
Finding the Page
Every video you record or upload gets one of these, so the first thing is knowing where it lives.
From the studio dashboard, go to Videos and open the one you want. That is the page. Everything below is on it.
Worth knowing before you go further: this is not a video editor with sharing bolted on, and it is not a sharing tool with an editor bolted on. It is one screen where the cut, the presentation, the distribution, and the results all sit together, which changes the order in which you naturally do things.
Auto Titling and Your First Twenty Seconds
Videos title themselves. Whatever you say in roughly the first twenty seconds becomes the automatic title, and you can change it with the pencil icon if you want something different.
Most people treat that as a convenience and move on. There is a more useful way to read it.
If your opening twenty seconds becomes your title, then your opening twenty seconds had better be worth titling. A recording that begins with "hey, so, um, I just wanted to reach out about" produces exactly the title you would expect. A recording that begins with the point produces a usable one.
The rule I would apply is to say the thing first and the pleasantries second. It improves the title, and it improves the video, because the same principle that makes a good title makes a good opening for the person watching.
Video Editing: Split, Delete, Undo
The basic video editing tools are at the bottom of the page, and the whole trimming workflow is three controls.
- Find your first cut point. Press play to watch, or drag the playhead along the timeline until you are at the start of what you want to remove.
- Click the scissor icon to split the clip there.
- Drag to your second cut point, at the end of the section you want gone.
- Click the scissor icon again. You now have three pieces on the timeline.
- Select the middle piece. Whatever is highlighted in orange is what will be removed.
- Click the trash icon. That section is gone.
To reverse it, use undo. Note that each cut is its own step, so removing a section that took two splits and a delete needs several presses of undo rather than one. Press it as many times as you made changes and you are back where you started.
Two splits and a delete covers most of the video editing people actually need after recording: the false start at the beginning, the interruption in the middle, the trailing silence where you were reaching for the stop button. It is not a production suite and does not pretend to be. It handles the cuts that would otherwise stop you from sending the video at all.
The Whole Page at a Glance
Everything available once a video is saved, and what each control is for.
| Control | What It Does | When You Reach for It |
|---|---|---|
| Title, pencil icon | Overrides the automatic title taken from your opening | Whenever the auto title is a false start rather than the point |
| Pin | Keeps a video at the top of your library | For the handful you send repeatedly rather than once |
| Preview | Opens the live landing page in a new tab | Before every send, to see what the recipient sees |
| Preset selector | Swaps the surrounding page for a different saved preset | Sending the same video to a different audience |
| Timeline editor | Split, delete, and undo on the recording itself | False starts, interruptions, and trailing silence |
| MP4 download | Gives you the file | Uploading natively somewhere else, or archiving |
| YouTube publishing | Sends the video to YouTube | Anything intended for a public channel as well as a send |
| Captions | Provides the closed caption version | Accessibility, and anywhere video autoplays muted |
| QR code | Every video has one, ready to print | Bridging physical moments to the video |
| Owner | Transfers the video to someone else | Handovers, or a colleague taking over an account |
| Activity | Shows watches and button clicks | Before every follow-up |
| Content analysis | Generates a breakdown of delivery and effectiveness | When a video underperforms and you want a second opinion |
Previewing and Switching Presets
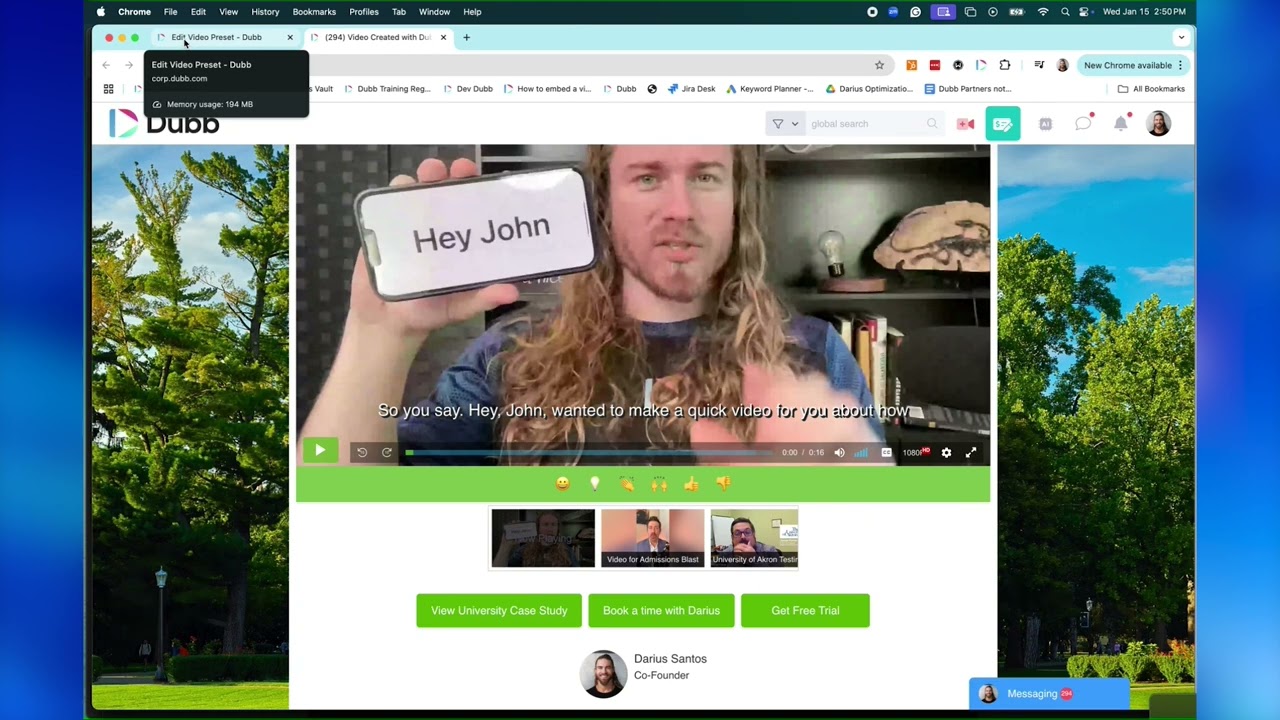
The small square icon with an arrow, over to the right, opens the video's landing page in a new tab exactly as a recipient would see it. Video, buttons, chat, everything in place.
Preview before you send. It takes four seconds and it is the only way to catch the case where the page around your video is not the page you assumed.
The dropdown beside it is the more powerful control. It swaps the preset, meaning the entire page surrounding this video changes to a different saved configuration. Same recording, different buttons, different proof, different background.
That is what makes one video reusable across audiences. Record once, then send it wrapped in whichever page suits the person receiving it, without re-recording anything.
The QR Code, and Where to Put It
Every video has a QR code, available on this page. It is the most underused control here, because it solves a problem most people do not think of as a video problem: getting a physical moment to continue online.
| Placement | The Moment It Gets Scanned | What the Video Should Open With |
|---|---|---|
| Door hanger | Someone pulls it off their handle, mildly curious | Acknowledge the object. "Thanks for pulling me off the door" earns the next ten seconds |
| Direct mail | Standing over a stack of post, deciding what to bin | Say who you are and why this piece is different, immediately |
| Event or conference booth | At your placard, or after you walked the floor and met them | "It was great to meet you at the event." Record it on the day so it is specific |
| Open house counter | A visitor standing in the property, already interested | "Thanks for coming. If you want to see similar properties, tap below" |
The pattern across all four is the same. The scan happens at a moment you know something about, so the video can open by naming that moment. A generic video behind a QR code wastes the one advantage the format has, which is that you know exactly where the person was standing.
Two practical notes. Print a test at the actual size before committing to a run, since a code that scans on screen can fail at business card size. And remember the scan lands on the video's landing page, so the buttons under the video are doing the real conversion work.
Activity and Content Analysis
Two different things sit at the bottom of the page, and they answer different questions.
Activity tells you what happened. Who watched, whether they clicked any buttons, what the video actually did once it left you. You can isolate a particular thing you are looking for or view the whole picture. This is the tab to open before writing a follow-up, because it tells you which conversation you are actually having.
Content analysis tells you about the video itself. Click generate and it produces a breakdown covering delivery, analysis, and effectiveness.
Reach for the second when the first is disappointing. If a video is getting watched and producing nothing, activity has told you the distribution worked and the content did not, which is exactly when an outside read on your delivery is worth having.
Downloading, Publishing, and Captions
Three export routes, for three different reasons.
MP4 download gives you the file. Useful when a platform rewards native uploads over links, or when you want a copy outside the platform.
YouTube publishing sends it straight to your channel, which is worth doing for anything with a life beyond one recipient.
Captions deserve more attention than they usually get. They matter for accessibility, which is reason enough on its own. They also matter commercially, because video on social feeds autoplays muted, and a video nobody can follow without sound is a video most people scroll past. If you are downloading an MP4 for social, take the captions too.
Pinning, Ownership, and Privacy
Three smaller controls worth knowing about.
Pin keeps a video at the top of your library. Reserve it for the few you use constantly, since pinning everything is the same as pinning nothing.
Owner transfers a video to someone else, which is what you need when a colleague takes over an account or a video was recorded by one person for another's use.
Privacy, video replies, and design options round out the page. Video replies are the setting that lets a recipient send one back, which is the mechanism behind collecting testimonials, so it is worth knowing where it lives.
Common Mistakes and Troubleshooting
A title that is your first false start. The opening twenty seconds becomes the title. Either open with the point or fix it with the pencil icon.
Deleting the wrong segment. Whatever is highlighted in orange is what goes. Check the selection before clicking the trash icon.
Expecting one undo to restore everything. Each cut is its own step. Press undo as many times as you made changes.
Sending without previewing. The page around your video may not be the preset you assumed. Four seconds prevents it.
A generic video behind a QR code. You know where the person was standing when they scanned. Say so.
Printing a QR code without testing it at size. What scans on a monitor may not scan on a business card.
Never opening activity before following up. The data that would make your follow-up specific is one tab away.
Best Practices Worth Adopting
Open every recording with the point. It produces a better auto title and a better video, for the same reason.
Use video editing on the false start rather than re-recording. Two splits and a delete is faster than another take, and the take you already have is usually your most natural one.
Preview before every send until it becomes automatic. It is the cheapest error check available.
Build a second preset before you need it. Having one alternative page ready is what makes the preset dropdown useful rather than theoretical.
Record QR videos for the specific placement. What I see most often is one general video behind every printed code, which throws away the context that made the QR worth printing.
Video Editing Tools Compared
Basic video editing attached to a sharing platform is a different proposition from a dedicated editor, and it helps to be clear about which job you are doing.
| Tool | Editing Depth | What Happens After the Edit | Best Fit Use Case |
|---|---|---|---|
| Dubb | Split, delete, undo on a timeline | The video is already hosted, tracked, and ready to send from the same page | Business video where the edit is a cleanup step before sending, not the main work |
| Loom | Trimming and stitching on the share page | Hosted on a share page built for viewing | Quick internal recordings where nothing needs to follow the view |
| Descript | Deep, by editing the transcript as text | Export to wherever you publish | Long-form content where removing filler words across an hour is the job |
| CapCut | Full editing with effects, captions, and templates | Export a file to upload yourself | Social content where the edit is the creative work |
If you are producing content where video editing is the craft, a dedicated editor will beat any in-platform trimmer and it is not close. The case for the built-in one is different: most business video needs two cuts and a send, and moving the file to another application to achieve that is how a five-minute task becomes an afternoon.
Proof: Why This Actually Works
The design argument here is about proximity rather than capability. The trim, the page around the video, the QR code, and the results all live on one screen, which means the natural sequence after recording is cut, check, send, and later review. Split those across three tools and each transition is a place where the send gets postponed.
Two patterns hold across the videos we see. The first concerns trimming: people who trim a false start send the video, and people who decide to re-record it often do not send anything that day. The second take is rarely better anyway, since the first one is usually the most natural.
The second concerns previewing. Senders who open the preview before sending catch preset mismatches, and the ones who skip it are the source of most "the buttons under my video were wrong" questions. The check takes seconds and the mistake is invisible until a recipient sees it.
Methodology note: these are directional observations drawn from aggregated, anonymized usage patterns across Dubb users, not a controlled study. No figures are attached to either pattern, and outcomes vary by how often someone records and what they are recording for.
What I take from it is that the value of built-in video editing is not in what it can do. It is in what it stops you from having to leave the page to do.
Frequently Asked Questions
How do I trim a video after recording it?
Open the video from Videos in the studio dashboard and use the video editing tools at the bottom of the page. Drag the playhead to your first cut point and click the scissor icon to split, then drag to the second cut point and split again.
You will have three pieces on the timeline. Select the one you want gone, which will be highlighted in orange, and click the trash icon. To reverse it, press undo once for each change you made.
Why does my video have the wrong title?
Titles are generated automatically from roughly the first twenty seconds of what you say, so a video that opens with a false start gets titled with that false start.
You can change it with the pencil icon beside the title. Better still, open your recordings with the actual point rather than with throat-clearing, since the same habit produces a better title and a better opening for the viewer.
Can I change the landing page around my video?
Yes. Use the dropdown on the video page to select a different saved preset, and the entire page surrounding the video changes, including the buttons and the background.
Preview it afterwards using the small square icon with an arrow, which opens the live page in a new tab exactly as a recipient would see it. That is also the check worth running before any send.
What can I do with a video QR code?
Every video has one, and it is for bridging physical moments to the video. Print it on door hangers, direct mail, a placard at an event booth, or a card on the counter at an open house.
Record the video for the specific placement rather than using one general clip, since you know where the person was standing when they scanned. Test the printed code at actual size before committing to a run, because a code that scans on screen can fail when printed small.
How do I see who watched my video?
Open the activity tab at the bottom of the video page. It shows watches and whether anyone clicked the buttons, and you can isolate what you are looking for or view everything.
Open it before writing any follow-up. It tells you which conversation you are actually having, rather than leaving you to guess.
What does content analysis do?
Click generate and it produces a breakdown of the video covering delivery, analysis, and effectiveness. It is an assessment of the recording itself rather than of who watched it.
The useful moment to run it is when activity shows a video is being watched but producing nothing. That combination means distribution worked and the content did not, which is exactly when an outside read on your delivery is worth having.
One Page for Everything After Record
The habit worth forming is short. After recording, open the video, fix the title if your opening was a false start, trim anything that would stop you sending it, preview the page a recipient will land on, and send. Later, open activity before you follow up.
Everything in that sequence is on the same screen, which is the point. The Dubb video page carries the timeline editor, the preset selector, the preview, the QR code, MP4 and YouTube export, captions, and both activity and content analysis, so nothing in the sequence requires opening another tool.
Start with the preview habit. It costs four seconds, it catches the one mistake your recipient would otherwise catch for you, and it is the fastest thing on this page to make automatic.